Just J.Faye

Hiking & Other Adventures

  • Home
  • About
  • Index
  • Hikes
  • Travel
  • Recipe
  • Workout
  • Other things

Backpacking The Four Pass Loop

August 13, 2018 by Jenna

Backpacking the Four Pass Loop has been on my bucket list for almost two years. It’s been on Michael’s too. We finally made our bucket list dreams a reality and decided to hike it!

four pass loop

The Four Pass Loop Route

The Four Pass Loop is a 26.6-mile trail just outside of Aspen, Colorado in the Maroon Bells-Snowmass Wilderness. On this loop you hike over four passes (hence the name) over 12,000 feet – West Maroon Pass (12,590 ft), Frigid Air Pass (12,415 ft), Trail Rider Pass (12,420 ft), and Buckskin Pass (12,500).

four pass loop

Source

You can hike the loop counterclockwise or clockwise. It seems that hiking the Four Pass Loop clockwise, starting with West Maroon Pass, is more popular since it’s not as steep.

Most people backpack the loop in 3-4 days. Some people trail run it in a day! We decided to try it in 2 days. Our original plan was two get through 2 of the passes, camp, and then finish the remaining two passes the next day. However, when we took a look at the map and the mileage in between the passes we decided it made more sense to try to get through West Maroon Pass, Frigid Air Pass, and Trail Rider Pass all in the first day and camp at Snowmass Lake. Then save Buckskin Pass for the last day. It was an aggressive plan, but we were ready for the challenge!

four pass loop

Source

Getting To The Four Pass Loop

The Four Pass Loop starts at the Maroon-Snowmass Trailhead just outside Aspen. You can drive your car all the way down Maroon Creek Road and park at the trailhead, but you can only drive to the trailhead before 8:00 am or after 5:00 pm. You also need to be lucky enough to get a spot at the overnight parking lot. It fills up quick. If the lot is full or you arrive sometime 8:00 am – 5:00 pm you need to park at Aspen Highlands. You’ll have to pay for parking and for a bus pass (more info here). Then take the shuttle up to the trailhead. It’s slightly inconvenient and is obviously more expensive, but Maroon Bells is such a popular destination (it’s the most photographed spot in Colorado), so I understand why they try to regulate the traffic.

four pass loop

Once you’re at the trailhead make sure to self-register and fill out a backpacking permit.

Also, make sure to have a bear can! It’s required.

The Four Pass Loop Day 1

Michael and I got up to the ranger booth at 7:30 am and found out that the overnight parking lot was already full, so we had to take the shuttle up to the trailhead. After filling out our permits we started hiking around 8:30 am.

The Four Pass Loop starts right at the iconic Maroon Bells, one of the most photographed places in Colorado.

four pass loop

The first 1.5 miles up to Crater Lake has a slight incline. At 9,500 feet this felt tougher than it should have! But after the lake the trail smoothed out and was pretty flat for the next 2.5 miles. I was actually starting to get worried that we were on the wrong trail, despite following all the signs for West Maroon Pass. I just figured we’d be climbing a lot more.

four pass loop

We took our first break at mile 4 and then the trail started to incline a bit. Gradual at first, then a little steeper, and then we gained 800 feet in .7-miles to the top of West Maroon Pass at mile 6.5. It was something! I haven’t hiked in this high of altitude since last July. It makes a difference. I felt like I was moving in slow motion, but I did it nonetheless!

By this time it was 12:15 pm and we took our lunch break at the top of the pass.

four pass loop

1 pass down, 3 to go!

The hike to Frigid Air Pass was short and quick, just 2.1 miles. The initial descent from West Maroon Pass was quite steep. Then it leveled out and we were walking through meadows of wildflowers. There was also a stream where we could filter water (we use the Sawyer Squeeze).

four pass loop

four pass loop

All of a sudden it was a quick, straight up hike up to Frigid Pass.

There were some lovely views.

four pass loop

2 passes down, 2 to go!

It was a 7-mile hike from Frigid Air Pass to Trail Rider Pass. The switchbacks down Frigid Air Pass were steep and then we landed in a meadow surrounded by beautiful mountains. The trail continued down gradually switching between meadows and forests.

four pass loop

We took a break near a stream at about mile 12 to fill up on calories and water. There were a lot of nice campsites in this stretch of the trail!

We continued onwards further down into a meadow. Then it was time to climb up to Trail Rider Pass. This one was a doozy!

The incline started with steep switchbacks up a ridge. Steep as in climb-1100-feet-in-mile steep and at 10,000 feet no less. The mile was BRUTAL. We hiked slow and steady with very little conversation (because let’s save the oxygen for breathing). From there the trail softened slightly. It was still going up, but not at quite the same intensity. The worst part about it was that we were coming up to a false pass. It looked like it could be the pass, but we knew it wasn’t.

One we passed the false summit we could finally see the real pass. It was about a mile away. Hurray! We even got to walk on a flat/slightly down trail for a bit. It was so luxurious. It actually rejuvenated and motivated me a bit. The quick snack break helped too.

four pass loop

We had a little less than a mile to hike up to Trail Rider Pass. It was slow going, but I put one foot in front of the other and continued to carry myself up the trail.

During these difficult passes I’ve been trying to fill my head with words of encouragement rather than doubt. Instead of worrying about if my heart would suddenly go into ventricular tachycardia (VT) I thought about how happy I was to be out backpacking. I thought about all those times I had yearned for it throughout my surgeries, hospital stays, and recovery periods. I thought about how grateful I was that my body could do this type of stuff again. I thought about how blessed I was to be surrounded by beautiful scenery and spending time with the one I love, despite my legs and lungs being on fire. The power of positive thinking is strong! It really helped push me up those passes.

Finally, we made it to the top of Trail Rider Pass!!

3 passes down, 1 to go!

The views from both sides of the pass were spectacular. On one side we saw gray skies and mountains and on the other side we saw blue skies, mountains, and Snowmass Lake.

four pass loop

four pass loop

four pass loop

Snowmass Lake was extra pretty since that was our camping destination for the night.

From Trail Rider Pass it was 2.2 miles down to Snowmass Lake. By this point Michael and I were both ready to be done, so it seemed to take a little longer than it should have, but we finally made it.

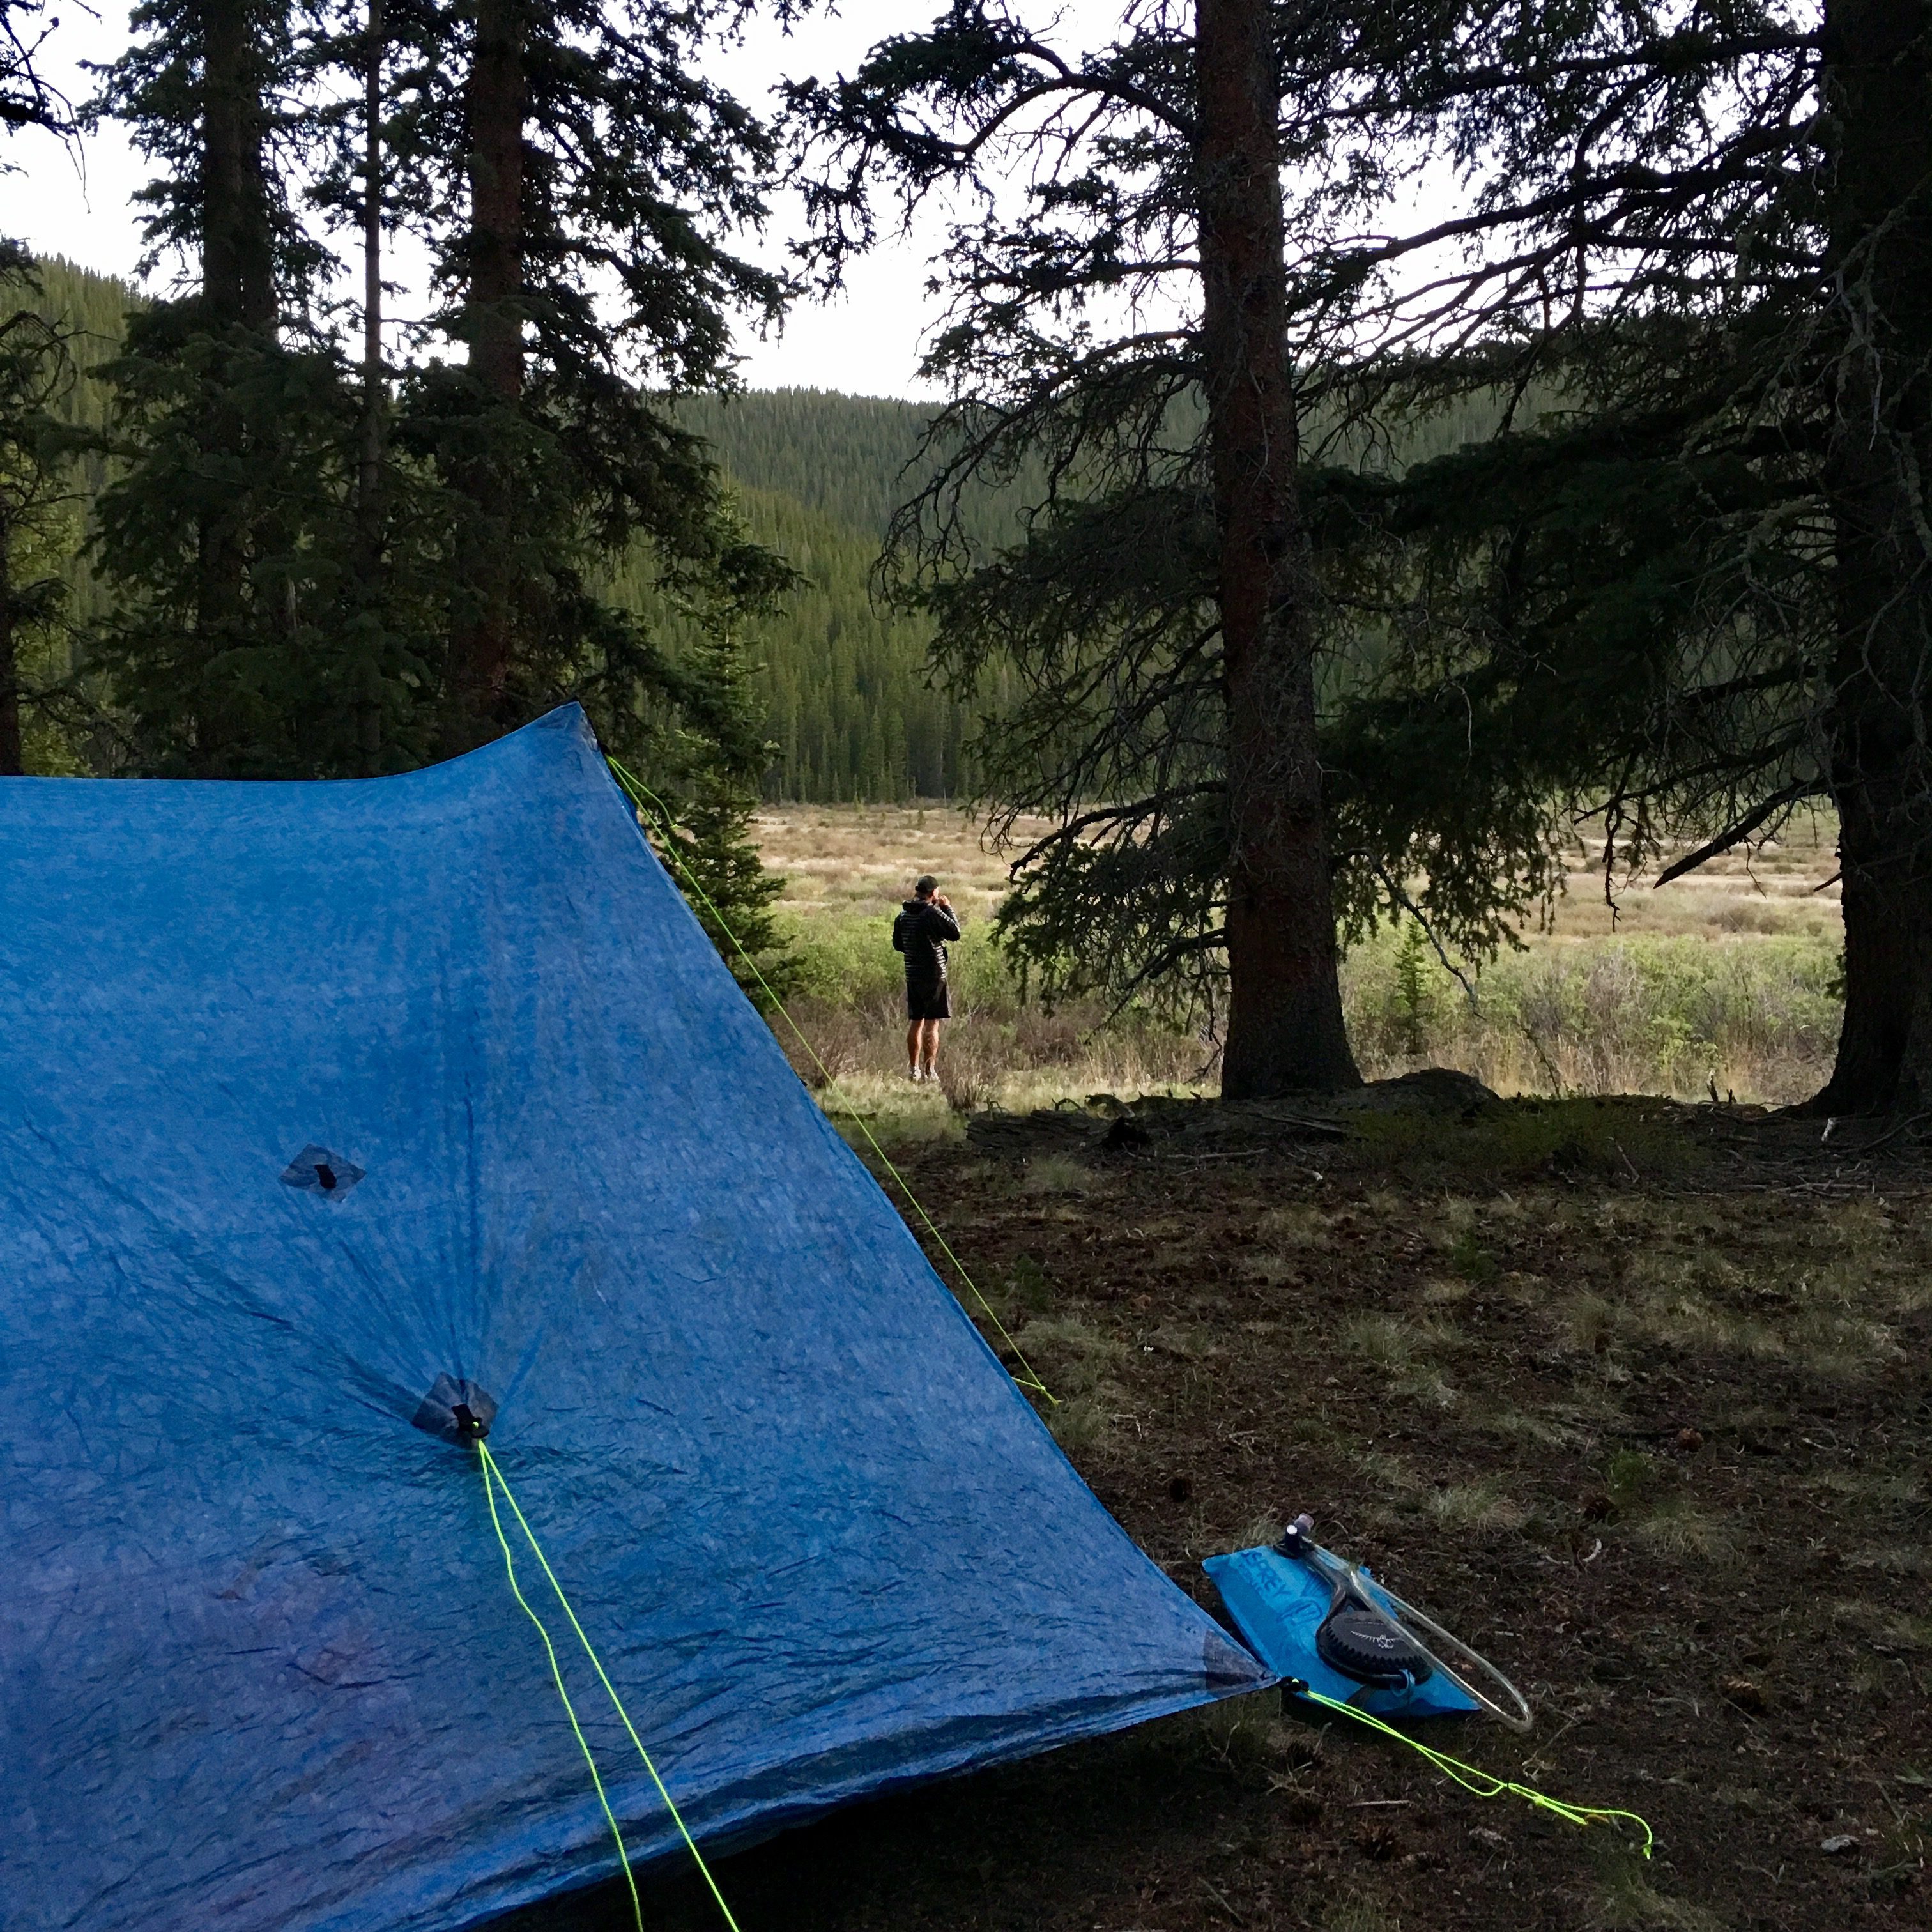
The campsite was pretty full. Most people probably got there early to mid-afternoon. We arrived shortly after 7:00 pm. However, we were able to find a lovely campsite near the water. Michael set up the tent, while I filtered water. The thing about backpacking is that you can’t just get to your campsite and relax. There are chores to be done first! Those things went fairly quickly.

Since we needed to bring a bear can, which are heavy and bulky, we decided to pack light, even lighter than normal. Michael carried the bear can (because he’s the best) along with our extra food for the next day. This meant that all I had in my pack were my sleeping quilt, sleeping pad, toiletries, some extra clothes, a water filter, and electronics. It was so light! Michael’s bag really didn’t look much heavier. Everyone thought we were day hikers with our tiny packs. I have never seen heavier packs than I have on the Four Pass Loop! The hike was difficult enough with my small pack. I can’t imagine what it would have been like with a full 60-liter pack!

Anyways, since we were packing light we didn’t pack a camp stove. This meant dinner was cold-soaked ramen. It honestly wasn’t bad! Nice and salty. But after hiking 18 miles I think anything would’ve tasted good.

We then brushed our teeth, took some Tylenol (preventative measure), and headed into the tent.

We hiked 18.2 miles in 10.5 hours.

four pass loop

The Four Pass Loop Day 2

After a long day of hiking the previous day we decided to not set an alarm and just wake up whenever we woke up, which happened to be around 8:00 am.

We gathered up our stuff, ate a quick breakfast (a bar and cold coffee), and got on our way around 9:15 am.

four pass loop

My body was moving a little slow in the morning. I wasn’t sore yet, but my legs felt a little heavy and my cardio seemed a bit worn out. Fortunately the first 1.5 miles of hiking was a fairly flat path. This helped me warm up a bit. Then there was a mile of steep switchbacks followed by another mile of a more gentle grade and then we were on the top of Buckskin Pass!

four pass loop

4 passes down, 0 to go!

I loved looking back on the views of Snowmass and Capitol 14ers and forward to Pyramid.

four pass loop

I also loved that we finished our final pass and all we had to do was hike down a few miles to the trailhead.

We took a snack break. We also saw this mountain goat!

four pass loop

The switchbacks on the back side of Buckskin Pass were a little steep for the first mile and the leveled out to a more gradual descent.

It was starting to get pretty hot, so I’m glad we were done with our uphill hiking! Our last few miles were through Aspen trees.

four pass loop

About 4.5 miles after leaving Buckskin Pass we were back at Maroon Lake. I had to take some extra time to drink these views in. It was just so pretty!

four pass loop

We had just enough time to use the bathroom before jumping on the shuttle to bring us back down to Aspen Highlands.

We hiked 8.4 miles in 4 hours.

We did it!

Four Pass Loop Thoughts

Overall, I really enjoyed backpacking the Four Pass Loop. It is such an iconic Colorado hike. I’m glad I can finally check it off my list.

The scenery is gorgeous. Is it the most beautiful hike in Colorado as it is often claimed to be? That I don’t know, but I don’t think you’d be disappointed.

The one unfortunate thing is that so many people hike this loop. Michael and I saw more people in the first four hours of Four Pass Loop than we saw doing the Northern Circle and the Devil’s Dome Loops combined. Typically this isn’t a bad thing. I love talking to people on the trail! The thing that makes this unfortunate is I saw so much toilet paper and garbage. People, please pick up after yourself!

Aside from that point, it’s amazing and I highly recommend it.

four pass loop

I am so proud of myself for finishing this, much less being able to do it in only 2 days. This is the hardest thing I’ve done since recovering from heart surgery. Fortunately the Four Pass Loop was much more enjoyable than that!

To celebrate Michael and I went to Dairy Queen and ate Blizzards for lunch.

I’ll be dreaming about backpacking the Four Pass Loop for a while!

four pass loop

four pass loop

Share this:

Filed Under: Hikes Tagged With: backpacking, colorado, colorado hikes, hiking

Colorado 14ers: Mount Harvard

July 25, 2017 by Jenna

It’s 14er season here in Colorado! Michael and I decided to bag our first one of the summer together on the 4th of July. Mount Harvard was our target.

Mount Harvard

For those that are not familiar, a 14er is a mountain peak that is above 14,000 feet. Colorado has 58 of them. The peaks range from easy to very difficult, but even the “easy” ones are a challenge. Gaining at least 2,500 feet of elevation and hiking above 10,000 feet where the air is nice and thin isn’t necessarily a breeze.

Mount Harvard

I hiked four 14ers last year (Grays, Torreys, Quandary, and Bierstadt) and hiked Evans a month ago. I’m still not sure if I can officially count Evans, because I started at Summit Lake and only gained 2,000 feet of elevation. The general rule of thumb is that you need to gain 3,000 feet for it to be legit. The jury is still out for debate on it.

( I think I’m going to count it.)

Mount Harvard is in the Collegiate Peaks Wilderness near the town of Buena Vista. It’s the third highest peak in Colorado, sitting at 14,420 feet. This 14-mile round-trip hike had 4,600 feet of elevation gain (and loss), so there is no need to debate this one. It was a doozy and I had an absolute blast.

Mount Harvard

To avoid waking up at 2:00 am and driving almost 3 hours to the North Cottonwood Creek Trailhead, Michael and I drove up the night before and camped at the trailhead. Not only did we get to “sleep in” until almost 5:00am, we also got to camp and start to acclimate to the altitude. Triple bonus.

There was an abundance of great campsites right off of the trailhead. The sun was already starting to set by the time got there, so we immediately started setting up the tent.

Actually, I lie. Michael set up the tent while I was busy making 14er signs. Because does climbing a 14er even count if you don’t take a picture with the sign at the top!? I’m not sure…

So anyways, Michael set up the tent while I made a sign. We each have our duties. Then we cooked/ate dinner and enjoyed a little fire before crawling into the tent for bed.

Mount Harvard

The 4:40am alarm felt really early, but I eventually dragged myself out of bed and started getting ready. Somehow I’m really slow in the morning and despite waking up 10 minutes before Michael, he was still ready before I was. I think I need to do a time analysis. There are definitely some process improvement opportunities here.

We hit the trailhead (9,900 feet) just before 5:30am following this route to the summit. The first few miles were mildly rolling hills through the trees, which was a nice warm up and a great way to settle into our “all day” pace. I’ve been dealing with some heart issues recently, so a gradual warm up (and a lot of water!!) really helps set me up for success.

Our first stop was at about mile 4 just below tree level for a quick bathroom and snack break. From here we started walking into some willow bushes, mountain run-off, and beautiful views of Harvard, Columbia, and the surrounding peaks. It was turning into a gorgeous morning with bright blue skies.

Mount Harvard

After crossing a stream the trail leveled out a little bit. We had a clear view of the peak of Mount Harvard, but still had quite a way to climb! At this point we started looking for marmots and mountain goats and Michael proposed a bet: Whoever saw the first marmot got to pick what we were eating dinner and whoever saw the first goat got to have dinner paid for them.

I lost both bets :/

Mount Harvard

From here we began to climb up a sort of stone staircase with switchbacks that led us up to a base of a nice, little snow field that basically went straight up. Yikes. The snow was covering the trail so it was difficult to know where to go. We took a quick break to put on our microspikes, eat some Sour Patch Kids, and figure out what route to take up. There was a guy in shorts and a t-shirt trying to climb straight up and it was very clear that he was struggling, so we free-formed switchbacks to the top of the snow field. Microspikes and trekking poles were a lifesaver here.

Mount Harvard

Once we got through the snow we ditched our microspikes and found the actual trail. There was a little bit more switchbacking (<- real word?) to a ridge and then it was the final push to the summit. And all of a sudden (7 miles and 3.5 hours later) we were at the peak of Mount Harvard at 14,420 feet!

Mount Harvard

Can you tell we are big fans of Feral Mountain Co?

Look at the gorgeous view!

Mount Harvard

We hung out at the summit for almost an hour – taking pictures, eating snacks, chatting with other hikers, watching marmots, and debating if we wanted to tack on Mount Columbia as well. In the end we decided not to. The trail up to the summit looked pretty snowy and the trail down is very steep and still being partially built. We’ll save Columbia for another time.

Once we got our fill of pictures, snacks, chatting, and marmots we turned back to head down to the trailhead the way we came. Another 7 miles and 3.5 hours later we were back at our car where we immediately put on sandals, chugged electrolytes, and headed back to Denver.

Mount Harvard

Overall, I loved the Mount Harvard hike! At 14 miles it was long, but it was also very gradual until, of course, the last mile to the summit. The views were beautiful both along the trail and at the summit. We also lucked out with beautiful weather. I highly recommend it!

Mount Harvard Stats:

  • Length: 14 miles
  • Type: Out and back
  • Beginning elevation: 9,900 feet
  • Elevation gain: 4,600 feet
  • Location: Buena Vista, CO
  • Trailhead: North Cottonwood Creek Trailhead
  • Route: South Slopes
Share this:

Filed Under: Hikes Tagged With: 14er, colorado, hiking

45-Mile Backpacking Trip in the Lost Creek Wilderness

June 27, 2017 by Jenna

The wilderness was calling. Neither Michael nor I had been backpacking since we went to Moab in January. We were way overdue for an overnight outdoor adventure, so we picked a weekend, took off work, and started planning a trip in the Lost Creek Wilderness.

45-Mile Backpacking Trip in the Lost Creek Wilderness

The original idea was to head down to Salida to camp and hike a couple 14ers (Shavano and Tabeguache, maybe Antero); however there was quite a bit of snow on the mountains, so we tabled that idea for another weekend.

Michael planned out a 45ish-mile loop for us to hike in 3 days. 45-MILE LOOP. This would definitely be the most hiking I’ve ever done. So far this year, I’ve gotten in a few 17-20 mile hikes, but those were just day hikes where I was carrying a small pack with some snacks and water and then went home to sleep in my comfortable bed afterwards. This would be carrying a pack full of camping gear and food, sleeping in a tent, and waking up for another full day of hiking (x2).

Somehow, it all seemed way more exciting than it did daunting. I knew Michael wouldn’t put me through something he didn’t think I could do, so I was all in.

This was our route:

lost creek wilderness 45-mile trail map

Lost Creek Wilderness Packing

Having hiked the PCT, the Colorado trail, and a portion of the CDT, Michael is expert on packing for adventures like this. As someone who tends to over-pack, I needed his help.

I laid out all my gear and let him walk through it. He took out my deodorant and soap (because we’re both going to smell anyways), gifted me a lovely poop shovel, and let me borrow his lightweight Therm-a-rest pad and old hiking poles.

Here is what I ended up with after the shakedown:

  • Gear: REI Traverse 48-liter pack, 30-degree sleeping bag, Therm-a-rest NeoAir sleeping pad, Black Diamond trekking poles, Etekcity camp stove, fuel, Sea to Summit long camp spoon, Etekcity water filter, Platypus bottle, Osprey 3-liter bladder, 1-Liter Smartwater, lighter
  • Toiletries: toothpaste, toothbrush, sunscreen, hand sanitizer, toilet paper, wet wipes, poop shovel, ibuprofen.
  • Clothes I packed: Patagonia rain jacket, Mountain Hardwear puffy coat, light long-sleeve shirt, leggings, 1 pair underwear, 1 pair of socks, hat
  • What I wore: sports bra, tank top, Athleta Trekkie shorts, socks, Saucony Peregrine trail runners, UV Insect Shield Buff, sunglasses

The plan was to hike in the same clothes every day and wear the items in my pack while at camp. Michael carried the tent in case you were wondering where that important piece of gear was hiding.

Based on long marathon training runs and longer hikes, I know that I typically need a snack every 4-5 miles (~2 hours) to avoid bonking. I assumed 8 hours of hiking per day, along with 2 breakfasts and 2 dinners and ended up with:

  • Breakfasts: instant oatmeal packet (x4), instant coffee (x2)
  • Dinners: ramen noodle packet (x2), salmon pouch (x2)
  • Hydration: 3 Nuun tablets, 4 Scratch packets, 3 Crystal Light packets
  • Snacks: 3 packets Justin’s nut butter, 6 bars (variety of brands like this and this), 3 small baggies of trail mix, and 3 packets of gummies/energy chews.

I either packed too many snacks or didn’t eat enough throughout the day, because I didn’t eat a packet of Justin’s, 3 bars, a bag of trail mix, and a packet of energy chews. I’d rather have a few snacks leftover than not have enough to eat, but it also would have been nice to carry a little less weight. It’s a fine line, but is something I’ll learn with time.

Lost Creek Wilderness Day 1:

Michel and I left Denver for our backpacking adventure in the Lost Creek Wilderness adventure early Saturday morning, a 2-hour drive. We started a little after 10:00am from the Goose Creek Trailhead (8,200 feet elevation) and headed west on the Hankins Pass Trail. Our plan for the day was to get in at least 15 miles, hoping to hit closer to 17-18 miles.

lost creek wilderness

The weather was warm with bright blue skies and a nice, cool breeze. It was pretty ideal; however, I was struggling. It took me a while to get adjusted to carrying a heavy pack, utilizing trekking poles, and hiking at 8,000+ feet of elevation. Not to mention the trail was basically up and up and up the entire day. I was breathing heavy and was slightly uncomfortable, but I kept chugging along putting one foot in front of the other knowing that it would (hopefully?!?!) get easier.

We took our first break after about 4.5 miles at the junction for Lake Park Trail (10,000 feet elevation). Despite the difficulties I was still all smiles.

lost creek wilderness

Lake Park Trail started taking us north and kept us climbing up (11,560 feet elevation) and down through aspens, pines, and red rock formations until we reached the Brookside-McCurdy Trail (10,750 feet elevation). From here we continued heading north and heading up. We reached an old burn area with views of Bison Peak, McCurdy Mountain, and more distant mountains.

lost creek wilderness

lost creek wilderness

At this point we were about 14 miles in and I was definitely feeling the hike and the elevation. We stopped for a quick electrolyte and snack break and prepared ourselves for the final push of the day, a climb up to 11,900 feet.

The views were so spectacular. I had tears in my eyes, which could have been caused either by the beautiful views of Pikes Peak or by the wind whipping across my face.

lost creek wilderness views of pikes peak

It was all down hill from there. Literally. Within a few miles we dropped down to about 10,000 feet and ended at a little creek. We stopped to fill up our water and began keeping our eyes peeled for a spot to set up camp… and for moose. At this point we were wandering through a bunch of willow bushes and came across a lot of moose droppings. But alas, no moose 🙁

After another mile(ish) of searching we found a spot and started setting up camp. We put on our warm clothes, cooked dinner, brushed teeth, took some Advil PM, and climbed into the tent.

lost creek wilderness

I officially survived Day 1!

Day 1 Stats: 18 miles; 4,400 feet elevation gain

Lost Creek Wilderness Day 2:

We woke up at about 8:30am to another beautiful day! After rolling out of the tent, we began cooking breakfast, taking down the tent, and getting ready for the day.

Breakfast was two packets of instant oats mixed with instant coffee and some goji berries and mullberries. Yum!

lost creek wilderness camp breakfast

We hit the trail at 9:30am with a planned stop at the Lost Park campsite to use the facilities (no offense, poop shovel) and fill up on water. From there it was 2 miles until we connected with the Colorado Trail and started heading east. Michael hiked the entire Colorado Trail last summer and was reliving some memories. I love hearing about his adventures and try to not get too jealous while I’m listening. Maybe one day I’ll get to hike the entire trail.

Colorado Trail

I was feeling ok at the start of Day 2. Despite all the previous day’s climbing, my legs felt surprisingly great and my shoulders were only a little sore. However, my pack felt super uncomfortable on my back, almost like a sharp pain from my left shoulder-blade to my neck. We were in the middle of a short climb (about 500 feet) and I absolutely had to stop to make some sort of adjustment. I took off my pack and found a pea-sized rock lodged by the zipper just about my left shoulder strap. That was the little rock was the cause of all my pain! I felt infinitely better after that. I cannot begin to describe how relieved I was.

Again, all smiles at our snack break.

lost creek wilderness

The Colorado Trail led us on an old logging road through aspens and ponderosa pines, where we dropped about 2,000 feet over 6 miles to about 8,400 feet. We took advantage of the easy hiking and moved quickly, because our goal was to reach 20 miles.

Colorado Trail

From the Colorado Trail we got onto Rolling Creek Trail and started heading south. The trail was pretty gentle, so we continued to hike quickly. About a mile into Rolling Creek Trail we stopped for a quick bio break. I peeled off my pack and revealed two large blisters at the top of each collarbone. This will teach me to wear a tank top while carrying a heavy pack! Michael put moleskin and tape over each blister and I changed into a t-shirt.

I’m such a rookie.

After another mile of nice and easy hiking the trail crossed Rolling Creek and then went straight up. This is not an exaggeration. The trail was STEEP. We gained about 2,200 feet in about 2.5 miles. The first mile or so was through a gorgeous canyon, but I was too busy charging up the mountain to stop and take any pictures.

I just took mental pictures, please believe me when I tell you it was stunning.

At the top of the canyon we took a much needed water and sugar break – Sour Patch Kids ftw!! We then continued on switchbacks and headed up and up. About a half-mile from the top we were both out of water. I was running on sugar and adrenaline alone and actually felt pretty good. We made it to the top (10,650 feet elevation), high-fived each other, and immediately started going down, dropping 1,000 feet in a little over a mile.

This is about when I realized I was in love with trekking poles. They helped me hike swiftly during the flat parts of the trail, helped me stay upright and led to easier climbing on the steep uphills, and helped steady me and ease the pressure on my knees during the descent. I guess it’s just one more piece of equipment I need to invest in!

We eventually made it down to Wigwam Park (<- best name) and found a spot to camp next to a little creek.

lost creek wilderness

Michael and I were both drenched in sweat, so we immediately changed into dry clothes and hung our sweaty ones out to dry. I felt like I did after my 20-mile training runs – sweaty and drained, yet full of endorphins. It’s an odd combination.

Michael set up camp while I filtered water and then we followed the same routine as the previous night – cook dinner, brush teeth, take Advil PM, and crawl into bed.

It was ramen noodles and salmon for me, while Michael had bougey Pad Thai.

lost creek wilderness camp dinner

Day 2 was complete! I think we passed out by 9:00pm.

Day 2 Stats: 20 miles; 3,100 feet elevation gain

Lost Creek Wilderness Day 3:

We woke up at about 9:30am to our final day of hiking! Having already covered 37 miles we only had about 10 miles of rolling hills to go and planned to knock them out quickly.

Our hiking clothes were still slightly damp with sweat, so we moved them into the sun, crossed our fingers, and hoped that they would be dry after we ate breakfast and packed up camp. Thankfully, they were.

No one likes putting on a sweaty sports bra.

We hit the trail by 10:30am, heading east on the Wigwam Trail along some beaver ponds. After about one-half mile we turned south on Goose Creek Trail. From here is was a short 9.4 miles back to the car.

“Short” is relative. Compared to the previous days of 17- and 20-milers, 9 miles felt like nothing.

lost creek wilderness

The trail began with a 650-feet incline over about 2 miles. There was less “pep in my step” (as Michael put it) on this day, but I still felt pretty good overall – just a little pokey. From there it was rolling hills and gorgeous views down to the Goose Creek Trailhead. We took some very quick breaks (less than 2 minutes quick) here and there to take pictures, but basically charged through the miles.

lost creek wilderness

And then… we made it!!

Michael mapped and tracked everything using the Gaia app. Our total stats according to the app were:

  • Total distance: 46.85 miles
  • Ascent: +8,572 ft
  • Descent: -8,652 ft

Sometimes we didn’t pause it on breaks. Sometimes we did. Sometimes we forgot to re-start it. All in all, we probably hiked a little over 47 miles in 51 hours (including sleep and breaks).

Not too shabby for my first 3-day backpacking trip.

lost creek wilderness

After getting off the trail, we put on sandals (the most relieving feeling ever), hopped in the car, and headed back to Denver with a pit stop for Gatorade, because: dehydrated.

We celebrated the amazing weekend with long showers, steak salads, beer, and conversations about future adventures.

Lessons Learned in the Lost Creek Wilderness:

As a newbie at this whole backpacking thing, I learned a lot of lessons.

  1. Wear a t-shirt (or a muscle tank) to help eliminate collarbone blisters.
  2. When filtering water do not put the cap of the container that holds the dirty water onto the cap of the container with the clean water unless you want to risk getting giardia.
  3. Be careful when taking off hiking shoes at camp, because you might step in a bunch of burs. If you step in burs and try to put on leggings, burs will line the inside of your leggings and you will spend the next 15 minutes trying to pick them all off. The smarter idea is to change in the tent.
  4. A 3 lb 6oz sleeping bag is heavy and takes up a lot of space in a backpack. Either live with that weight or return it and splurge on one from Feathered Friends that only weights 1 lb 12 oz.
  5. Trekking poles are life savers.

Those are just the obvious ones.

Lost Creek Wilderness

I would strongly recommend a backpacking trip in the Lost Creek Wilderness. We covered 47 miles, but there are 130 miles of trails to explore ranging from shorter day hikes to longer backpacking trips. Reach more about the different trails here.

Overall, it was an incredible weekend. I’m so glad Michael and I could get away and spend 3 days out in the wild. It was full of challenges (heavy pack, high mileage, steep climbs) and many rewards (quality time with Michael and nature, beautiful views). I’d go again in a heartbeat and look forward to many more adventures like this to come!

lost creek wilderness

Share this:

Filed Under: Hikes Tagged With: backpacking, camping, colorado, hiking

Colorado Hikes: Sky Pond

October 17, 2016 by Jenna

Another beautiful Colorado Hike coming your way! This time it’s Sky Pond.

Colorado Hikes: Sky Pond

There is something about alpine lakes tucked into mountains that I absolutely love. Maybe it’s because they look like like this:

Colorado Hikes: Sky Pond

Maybe.

Compared to Gem Lake, the hike to Sky Pond is a little bit longer and a little bit more difficult, but just as awesome. This hike had been on my radar for a while, but I finally got to move it from the “must hike” list to the “this hike was awesome” list back in early September.

We (“we” being myself and a guy that I dated for a few weeks that I am no longer seeing, so he will only be mentioned as a generic “he” throughout this post) set out from Denver super early on September 10 to drive out to Rocky Mountain National Park. Our goal was to get there slightly before sunrise (6:30am), but it ended up being closer to 7:00am. The parking lot at Glacier Gorge was already full, so we parked at an overflow lot about ½-mile down the road. Bonus hiking miles!

For it being early September, the weather was a nice little fall preview. Brisk air in the morning with sunshine, bright blue skies, and some colorful aspen trees. It was a little chilly at the start, but we warmed up quickly with the sunshine and the hiking.

Be aware as there are some forks in the road during the first few miles, so make sure to follow the signs towards Loch Vale and Sky Pond. If you take a wrong turn, you’ll still end up someplace awesome (like Lake Haiyaha, which is on my “must hike” list), just not where you originally intended.

One great thing about this hike is that there are many things to see along the way – Sky Pond is not the only attraction! The first is Alberta Falls, which is just about one mile into the trail and is a 30-foot scenic little waterfall.

Colorado Hikes: Sky Pond

After Alberta Falls the incline begins to pick up and the switchbacks begin. Two miles later the trail brings you to the next landmark: Loch Vale.

“The Loch”, as it’s called, is a little subalpine lake surrounded by mountains. This would be a good place to stop if you need a little rest and/or snack.

Colorado Hikes: Sky Pond

From here the trail stays flat for only a short while and then the stairs begin and it gets nice and steep. Like I-definitely-can-tell-I’m-over-10,000ft-elevation steep. At this point my heart rate was pretty high and I was feeling light headed, but then I turned around and took in the views and everything was a-ok.

Colorado Hikes: Sky Pond

The stairs lead you right to the base of Timberline Falls, which is about 4 miles from the beginning of the hike.

Colorado Hikes: Sky Pond

Here is where the fun part begins: scrambling up some rocks. This was the first time I’ve ever had to do much scrambling during a hike. It was both terrifying and exhilarating. Because of the cooler morning temps, there was some ice on the rocks; however, I just took it slow with small movements and some advice from that guy and made it up in one piece.

Then you see a lake and it’s like “YAY! I made it to Sky Pond!” only to realize that it’s not. We weren’t expecting this one and totally would’ve stopped there if someone hadn’t told us that it was, in fact, Glass Lake. Other hikers are so helpful.

I didn’t mind that it was there though. It was beautiful.

Colorado Hikes: Sky Pond

The remaining trail to Sky Pond was quite tricky, as in we lost the trail and climbed over a bunch of rocks until we found it again. Then a little stone path a few steps lead right to it.

Colorado Hike: Sky Pond

Sky Pond is about 4.5 miles from the trailhead and sits surrounded by cliffs at about 10,900 feet. It was crazy windy, so we found a little cove that somewhat blocked the wind and had our lunch of pb&j, cheddar pretzels, and peanut butter oatmeal cookies. We were only two of a few people there at the time. It was very peaceful and we just sat and took in the scenery, watching the climbers in the distance and keeping our eyes on the marmots.

Colorado Hikes: Sky Pond

I still can’t believe how blue those skies were, especially when contrasting against the white/gray of the mountains.

It’s times like that when I realize how much I truly love hiking and being in the mountains. All the miles and climbs and gasping for air are totally rewarded.

And then my heart races in a different sort of way.

Colorado Hikes: Sky Pond

We hung out at Sky Pond for about 45 minutes and then started to head back towards the trailhead. Luckily on the way back we found the proper trail from Sky Pond to Glass Lake. It made things much easier.

It’s always interesting to hike trails in reverse. It’s the same scenery, but in a different perspective and in a different light of day.

As we were going down there were quite a few people just beginning their way up. We even passed by a little elk family chilling in the woods near the trail.

Colorado Hikes: Sky Pond

The round trip hike is about 9 miles, but with our bonus miles to the overflow lot and some additional wandering we ended up at about 10.6 miles. It was such a fantastic hike and ended up being a gorgeous day, so we decided to celebrate with some post-hike beers at The Barrel in Estes Park.

I hope you give this one a go!

Colorado Hikes: Sky Pond Colorado Hikes: Sky Pond

Here are some additional tips:

Sky Pond Stats:

  • Length: 9.0 miles
  • Type: Out and back
  • Beginning elevation: 9240 feet
  • Elevation gain: 1780 feet
  • Location: Estes Park, CO
  • Trailhead: Glacier Gorge Trailhead
  • Bathrooms: Yes

Weather, Clothes, and Food:

  • Weather: 50s at the start, but climbed up into 80s towards the end of the hike. Bright blue skies, but quite windy in the higher elevation.
  • Time of year: early September
  • Duration: About 6.5 hours, but we hung out at Sky Pond for 45-60 minutes.
  • Outfit: Eddie Bauer hiking pants, Athleta Chi tank, Under Armour quarter zip, Merrell hiking shoes, Smart Wool running socks, and The North Face rain jacket
  • Extras: Patagonia backpack, sunscreen, and sunglasses along with water and sandals for after the hike
  • Snacks: pb&j, cheddar pretzels, peanut butter oatmeal cookies, Quest bars, water, and no beer (because we forgot it)

Colorado Hikes: Sky Pond

Share this:

Filed Under: Hikes Tagged With: colorado, colorado hikes, hiking, rocky mountain national park

Colorado Hikes: Gem Lake

October 5, 2016 by Jenna

Gem Lake is a beautiful Colorado hike. This 3.5-mile roundtrip hike in Rocky Mountain National Park is worth every bit of that 1000 foot elevation gain. 

colorado-hikes-gem-lake

Oohhhh hiiiiii.

I’ve been away. And by “away” I mean, in Denver, but away from this space. Instead of being here I’ve been spending the bulk of my free time forming relationships – with Denver, with new friends, and with the mountains.

And you know what? It was a nice little break from blogging/writing/baking. However, lately I’ve found myself wanting to return. I think part of it is the change in the weather (there’s just something about fall, you know?!). No matter the reason, I’m happy to be here.

gem-lake-hike-2

As I mentioned I’ve spent quite a bit of time forming a strong bond with the mountains and doing a lot of hiking. I don’t want to say I’m obsessed, but I am in love. So I decided I would share some of my hikes on here.

  1. To log the experiences so that I can remember them for personal reasons.
  2. To share them with you in case you are ever in Colorado with the urge to hike.

With all that said, let’s jump right in.

This first one isn’t a super intense hike, but it is a beaut: Gem Lake.

gem-lake-hike-8

The Gem Lake hike is located in Rocky Mountain National Park just outside of Estes Park. It’s a small, beautiful lake (pond??) nestled right in the mountains.

I did this hike on the 4th of July with friends that were visiting from Minneapolis. A few of my Denver friends had hiked it the previous day and after seeing their pictures I decided that I needed to go see Gem Lake for myself.

Because seriously, look:

gem-lake-hike-3

We got to the Lumpy Ridge Trailhead at about 8:30am. Luckily it was still early enough to grab a spot in the parking lot. Parking is always a little bit of a gamble, but we got one and then we were off hiking.

The first 1/2ish mile goes through a sparsely wooded area with a slow and steady incline. The incline isn’t too intense, but it will get your heart pumping! Especially if you aren’t acclimated to the altitude. The trail continues and opens up to some beautiful views of Estes Park, Long’s Peak, and other mountains.

gem-lake-hike-5

From here the trees are a little bit more dense and the switchbacks begin, most of which are created with stone stairs, like a rustic spiral staircase through the wilderness. That’s fun, right?

After about 1.7 miles from the trailhead you’ll get your first view of the glorious Gem Lake!

gem-lake-hike-7

What a gem! Am I right?!

Baahhhahahaa.

After exploring the area for a bit (and taking 3 gazillion pictures) we climbed up some of the rocks on the far side of the lake to hang out and eat some snacks. We were equipped with pb&j, apples, bananas, Clif bars, trail mix and (of course) Bud Light. It was the 4th of July, after all.

If that isn’t an All-American picnic I don’t know what is!

gem-lake-hike-6

When we got our fill, we packed up our things, took a few more pictures, and hiked back down to the trailhead.

Overall, I would highly suggest this hike to anyone and everyone!

  • The views are ridiculously gorgeous.
  • It’s not too intense, but you still have to work a little bit.
  • It’s not an all day commitment. The total hike should take 2-3 hours, depending on how long you hang out at the lake.
  • You can hang out in Estes Park afterwards.

Oh and did I mention how beautiful it is?

I went in the summer, but I bet it’s absolutely stunning in fall with all the aspens changing colors. Let me know if you check it out!!

gem-lake-hike-1

The stats:

  • Length: 3.5 miles
  • Type: Out and back
  • Beginning elevation: 7860 feet
  • Ending elevation: 8900 feet
  • Elevation gain: 1040 feet
  • Location: Estes Park, CO
  • Trailhead: Lumpy Ridge Trailhead
Share this:

Filed Under: Hikes Tagged With: colorado, colorado hikes, gem lake, hike, hiking

North Table Mountain Park Hike

April 13, 2016 by Jenna

A few friends and I hiked North Table Mountain Park on Saturday, so I thought I’d share a little recap.

Who knows, maybe one day you’ll find yourself in Colorado looking for a little hiking adventure?! If so, call me up and I’ll join you 🙂

North Table Mountain Park

April is still pretty early in the hiking season. It seems like it is still winter in the mountains – they are covered in snow and full of skiers; however, it is definitely spring in the foothills! The hikes in these areas may not be as intense, but it’s a great way to get some warm up hikes in before attempting to conquer a 14-er. Which I hope to do soon.

North Table Mountain Park met our criteria of being moderately difficult, ranging 5-10 miles long, not covered in snow, dog friendly, and not too far from Denver. So, to North Table Mountain we went!

Our crew consisted of 5 people and 1 dog – just enough space to all fit in my roommate’s Ford Escape. We left Denver at around 10:00 and it was only about a 30 minute drive to get to the trailhead in Golden. There were a surprising amount of people at the start and the parking lots were full, so we had to park along highway 93. Slightly frightening, but it worked out just fine.

North and South Table Mountain offer a few different routes that vary in distance from 2.5 miles to 8ish miles. We choose the longer one, which was advertised on AllTrails.com as 7.6 miles. At the end of the hike my GPS showed 8.8 miles, but then when I checked it later the distance was recalibrated down to 8.0 miles. Still not bad overall!

This was our route:

North Table Mountain Park

As you can see we started the hike with a nice steep incline (going counter-clockwise around the loop), then had a gradual decline, and finished off the last few miles with some rolling hills. We took some scenic picture breaks, water breaks, and sunscreen breaks over the course of the hike. Overall it was a little over 900 feet in elevation gain. Since North Table Mountain Park is basically right in Golden, we weren’t fully enveloped in “nature”. You’ll see power lines and houses in our pictures, but there were still some great views of the mountains and a pretty little view of downtown Denver. No one was complaining.

Would you?

North Table Mountain Park

Judging by the amount of cars and people that we initially saw, I was expecting the trail to be pretty crowded. However, the specific trail that we took wasn’t too bad. We came across a few hikers, a few runners, and a good number of mountain bikers. At times the trail was pretty narrow, so we would have to stop and move to the side to let others pass (or vice versa). Everyone seemed to have good trail etiquette, but it’s always a good reminder to be conscious of the other people around you.

The weather was perfect at 65 degrees and sunny with a slight breeze. We still needed snacks and plenty of water. Also, sunscreen. I missed a few spots and got burnt. I’m not used to the intense sun yet and my pale skin was all “wtf is happening here?!” If it was any warmer it probably would have been too hot, so I would not recommend doing this hike in the prime summer months. There is no shade. It’d be brutal! But you could do it if you like that sort of thing.

North Table Mountain Park

The hike wasn’t too strenuous, but it was still a good workout. I could feel it in my glutes the next day (side note: “Good for the glutes.” Is my mantra while hiking up hills. I find it to be very motivating.) By the end we were all ready to be done. I may have some “only one more mile!” about three times and prematurely got people’s hopes up, but a little extra walking didn’t hurt. We all survived.

We rewarded ourselves with beers at the Buffalo Rose in Golden for all the effort we put in that morning. Beer after hiking is pretty much the best thing, especially when you’re with such a great crew.

North Table Mountain Park

Overall, I enjoyed hiking the North Table Mountain Park trail. I feel I would do it again and would be completely comfortable going by myself. Maybe even to take a stab at trail running? I won’t get ahead of myself.

But if every weekend of my life going forward involves the mountains, beer, sunshine, and great people I will be a happy, happy (and grateful!) lady.

Share this:

Filed Under: Hikes Tagged With: colorado, Denver, fitness, hike, mountains

  • 1
  • 2
  • Next Page »

hello and welcome!

my name is jenna, but you can call me j.faye. i am a lover of food, mountains, and sunshine. read more…

Follow Me

  • Bloglovin
  • Facebook
  • Instagram
  • Pinterest
  • Twitter

Never Miss A Post

receive updates via email:

Instagram

jenna.faye.ivey

Thankful for this crew ❤️ Thankful for this crew ❤️
Winter mode: activated. #snow #winter #mountains Winter mode: activated. 

#snow #winter #mountains #mountainlife #getoutside #outdoors #coloradohikingmoms #keepthelittleswild #liveferal #boymom #colorado #outdoorkids
Hike-or-treat & trunk-or-treats! It was a fun Hall Hike-or-treat & trunk-or-treats! It was a fun Halloween week with our little Mickey 🎃
The leaves. The views. The company! What an incred The leaves. The views. The company! What an incredible experience for our first two-nighter and last camping trip of the year (probably).

Thanks to @adventuresinnoticing & @anni_martini for being amazing friends/aunties. 

#colorado #camping #fall #leafpeeping #mountains #keepthelittleswild #coloradohikingmoms #feraldenver #outdoorsymom #boymom #dogmom #getoutside #lifeoutdoors #lifeofadventure
Cozy season is officially here ✨ #fall #cozy #cam Cozy season is officially here ✨

#fall #cozy #camping #keepthelittleswild #coloradohikingmoms #getoutside #lifeofadventure #motherhood #family #boymom #dogmom #outdoorsymom #rimby #coloradomom
My open heart surgery was 7 years ago and it’s an My open heart surgery was 7 years ago and it’s an anniversary I will never not celebrate. 

I carried a lot of trauma with me for a long time. I was nervous for every hike, every workout, religiously checking my heart rate, wondering if this would be the time my heart fails me again. Very dramatic, I know. But I kept at it, doing these things I love to do, working through the fear. Now the intrusive thoughts are few and far between. 

So here I am 7 years later, a stronger person both physically and mentally, hanging out at the top of a mountain with my babies after a nice, challenging hike.  It’s all I really want. 

I’m so grateful for this life and for the people who continue to support me ❤️

#openheartsurgery #heartwarrior #myocardialbridge #heartattacksurvivor #recoveryjourney #celebrate #adventure #lifeoutdoors

Copyright © 2026 · Foodie Child Theme by Shay Bocks · Built on the Genesis Framework · Powered by WordPress